
The first in a series of electronics projects where the kids and I try to make neat things.
My oldest son (8) and I wanted to work on some projects together during the week (especially since video games are now limited to the weekend). To that end, I’ve organized the workshop and we’ve begun working on small electronics projects. The aim is to keep them simple and fun. My plan is to assemble the basics myself first and then re-assemble, upgrade and re-build the code together. Though several hours of yelling at breadboards and IDEs is essential to any worthwhile project, I’ll save that for when he is a bit older. No sense in getting frustrated just yet…
The First Project: An OLED Attitude Indicator #
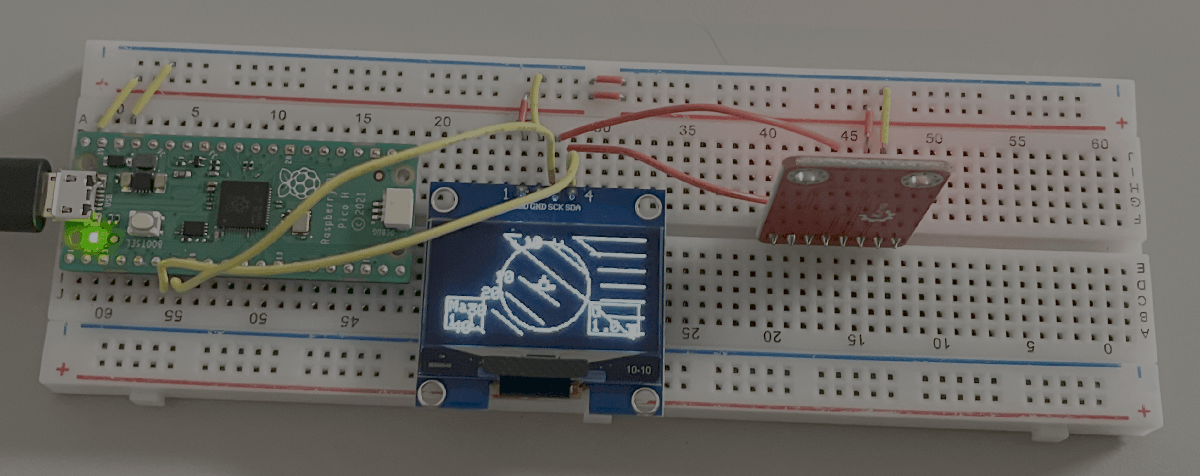
We’ve been watching the great youtuber, Peter Sripol for awhile now and really enjoyed his latest series on building a cardboard airplane. Specifically, in the video linked below he demonstrates a custom attitude indicator (not flight rated!). It was made with a bog standard OLED display and flyduino multiwii board with an onboard mpu6050 (gyroscope/accelerometer). He also printed a nice 3D case for the gear. As his fundraising supply sold out quick, we decided to make one ourselves. The plan is to use some kit we have on hand to recreate the fellow: a raspberry pi pico, SH1106 OLED displays and a Hoite MPU6050. If that goes well, we’ll 3D print a case and show it off to our pet hamster.
The Original Video from Peter Sripol #
First Steps and a Preview #
In the interest of keeping things proper and give my boys a healthy distaste for administration, we’ve followed the advice of our friend Bob Adams and started with this Product Requirement Template. It’s simple, as we are only creating a replica, but Here she is.
Time is limited today but I really wanted to get a new blog post out, so that’s all for now. The next entry on this project will go over our hardware issues, development environment, source code and 3D printing plans. For now, a preview of our current setup: 